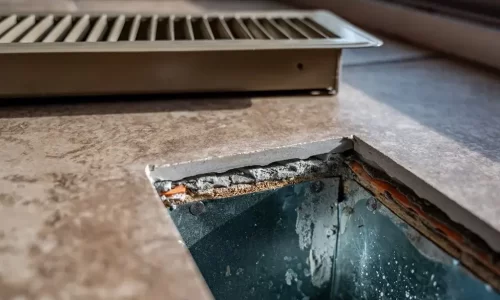
How to Install Floor Registers
Appropriate airflow is not merely crucial for comfort; it constitutes a significant element in the overall well-being of your residence. Floor registers are instrumental in guaranteeing the efficient operation of your HVAC system, facilitating the distribution of air across your living areas. However mundane it may sound, knowing the ins and outs of installing floor registers adds another feather to your homeowner hat. Whether it’s knowing register boot installation or what a floor register 4×12 even is, you’re in the right place.

The Legends of Your Home – The Floor Register
Imagine your home’s circulation system as a bustling highway network, with floor registers as the traffic signal—clearing bottlenecks and guiding air where it needs to go. These vent covers are often overlooked but are vital for maintaining temperature balance, air quality, and energy efficiency within your abode. They come in various shapes and sizes to match the air duct layout and the aesthetic of your interior.
Depending on your décor and HVAC needs, you can find floor registers with ornate designs or sleek modern styles. For instance, cast iron registers add a vintage touch for those looking to reminisce with their interiors, while flush mount or drop-in aluminum registers lend a contemporary, industrial vibe. Choose your register wisely, as its functions are two-fold—practical and decorative. Installing a floor register isn’t easy – although we have some advice in the next section, remember that professionals know all about installing floor registers.
Installing a ‘Grate’ Addition to Your Home
Prior to beginning, ensure your safety by deactivating your heating or cooling system. Below is a detailed guide for your reference:
- Measure Twice, Cut Once: Ensure accurate measurements of the register hole are taken to guarantee the purchase of a perfectly fitting unit. Use these measurements to cut or resize the vent on the floor if necessary.
- Ready for the Reveal: Once the hole is cut to the correct size, remove any debris or protruding edges that would hinder the register from sitting flat.
- Align and Secure: Place the register over the vent hole, aligning it nicely with the floor. Using the screw holes provided, gently secure the register to the floor. Be careful not to overtighten as this could damage the flooring.
- Fire It Up: Turn the HVAC system back on and check for proper airflow. Ensure there are no whistling or rattling sounds, and that the register is flushing properly with the floor.
By installing a register boot, you’re not just saving money on the installation cost, but also gaining knowledge about a vital component of your home’s infrastructure.
A Final Sweep
Keep in mind, although this task may be suitable for DIY enthusiasts, professionals offer valuable expertise. Should you have any doubts at any stage of the process, do not hesitate to consult them as they know how to install a floor register efficiently. Like a watchful lighthouse keeper, each register will be there, unobtrusively steering the thermal tides within your home. Take pride in the practical improvement you’ve made and the understanding you’ve gained about your own living environment.


